Knowledge Article
How to Import Employees into the Staff Management Module on the 925Worksuite ERP
0
0
Overview
This guide explains how to import employees in bulk using an Excel file in 925WorksuiteERP. This method helps you quickly upload multiple staff records instead of adding them one by one.
Prerequisites
Before uploading your file, ensure the following:
- File format must be .xls, .xlsx, or .csv
- The file must contain a header row
-
The following fields are compulsory:
- Employee ID
- Employee Name
- Designation
- Department
Step-by-Step Guide
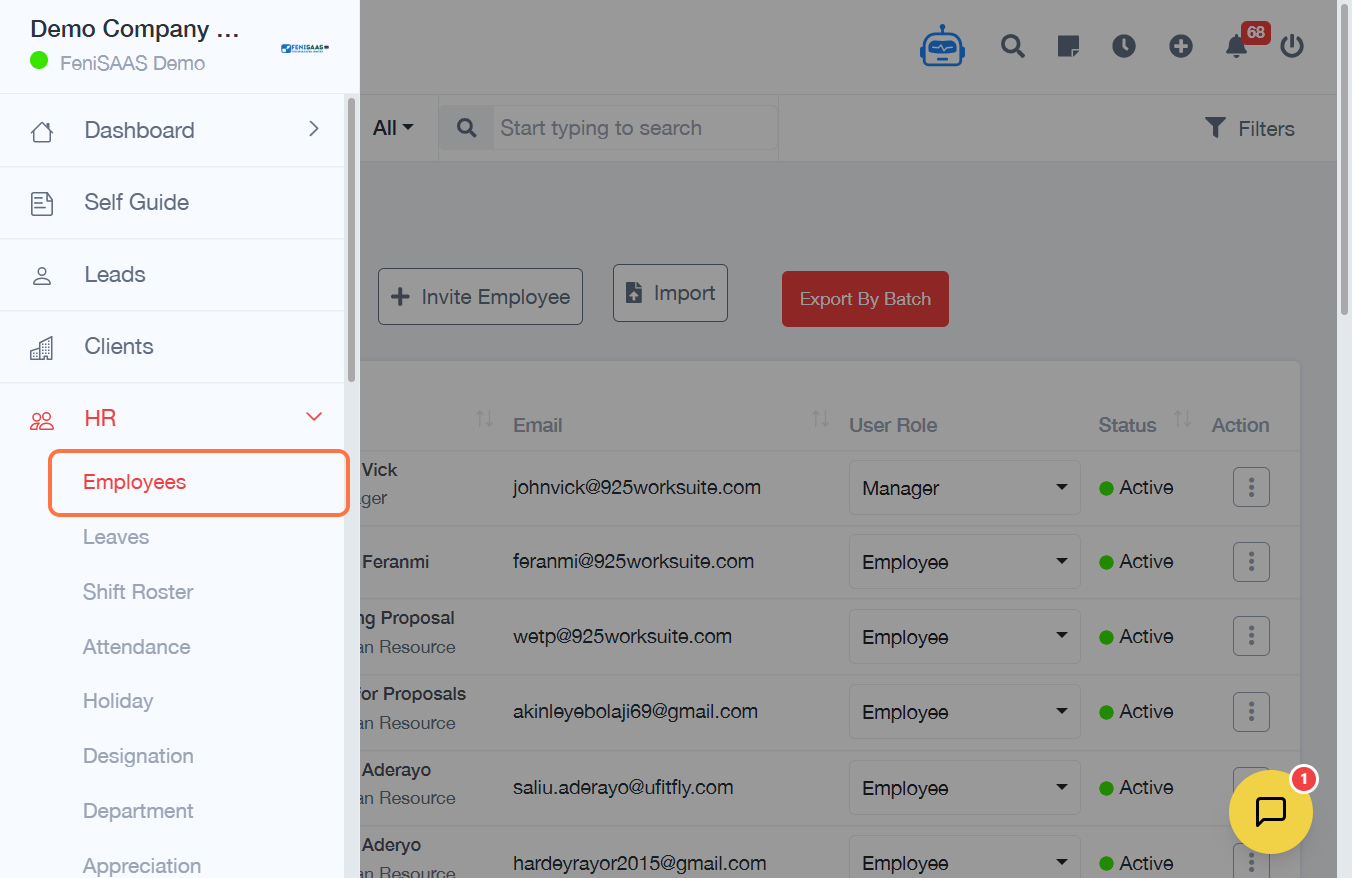
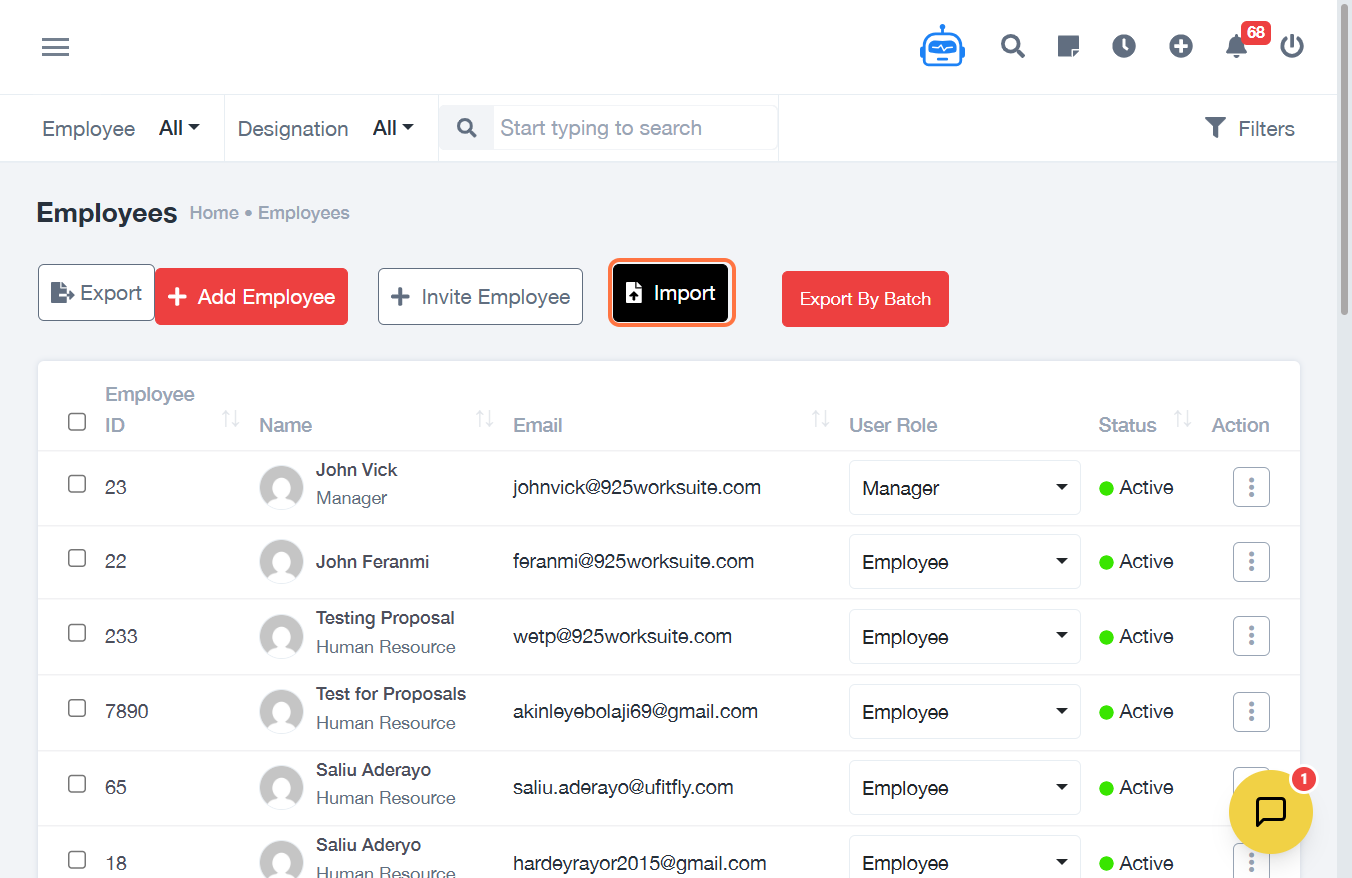
Step 1: Access Employee Module
- Navigate to Employees from the dashboard
Step 2: Start Import Process
- Click on Import
Step 3: Upload File
- Click on the upload field
- Select your Excel file
Step 4: Confirm File Settings
- Select File Contains Headings Row
- Click Upload and Move to Next Step
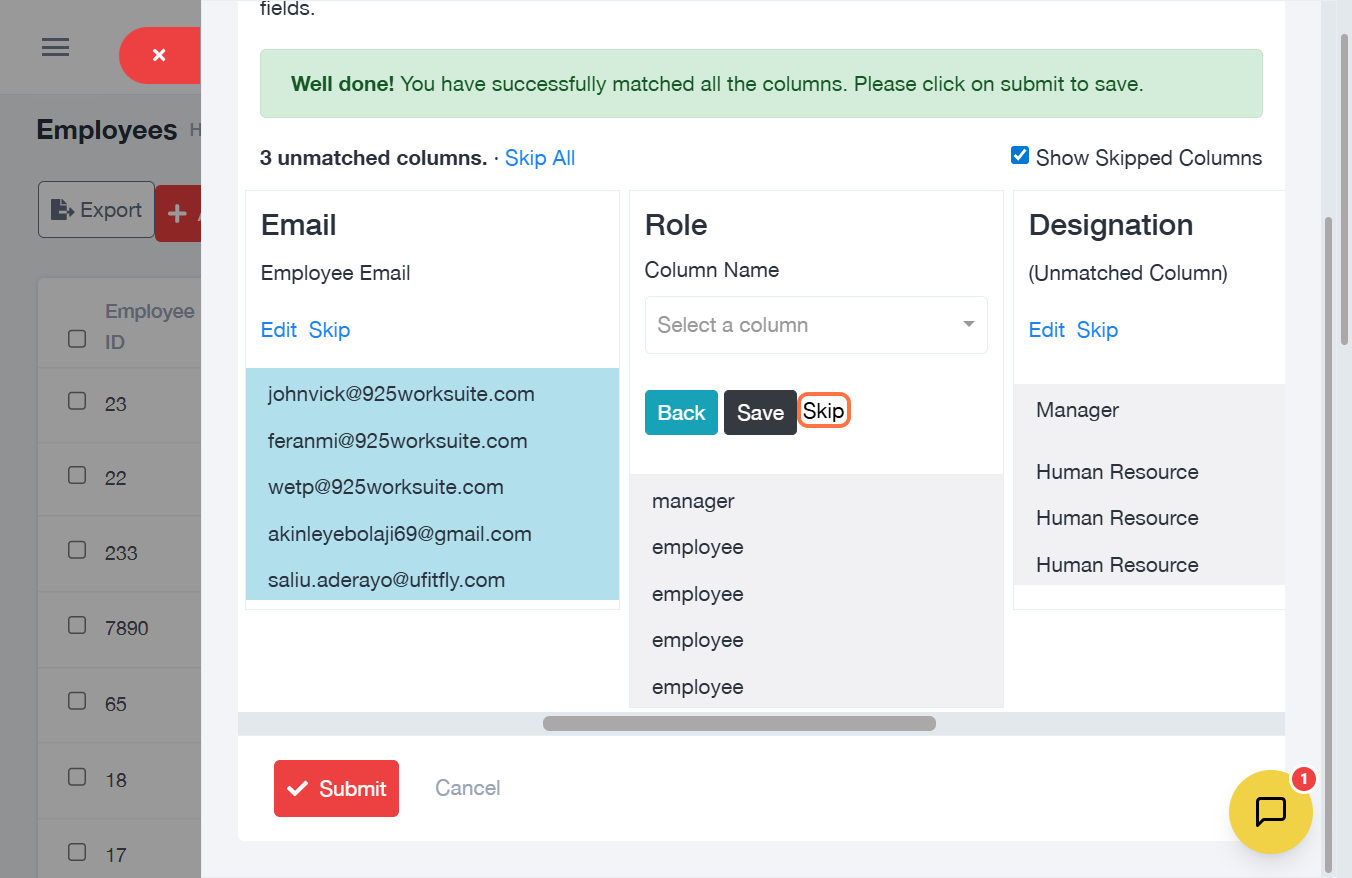
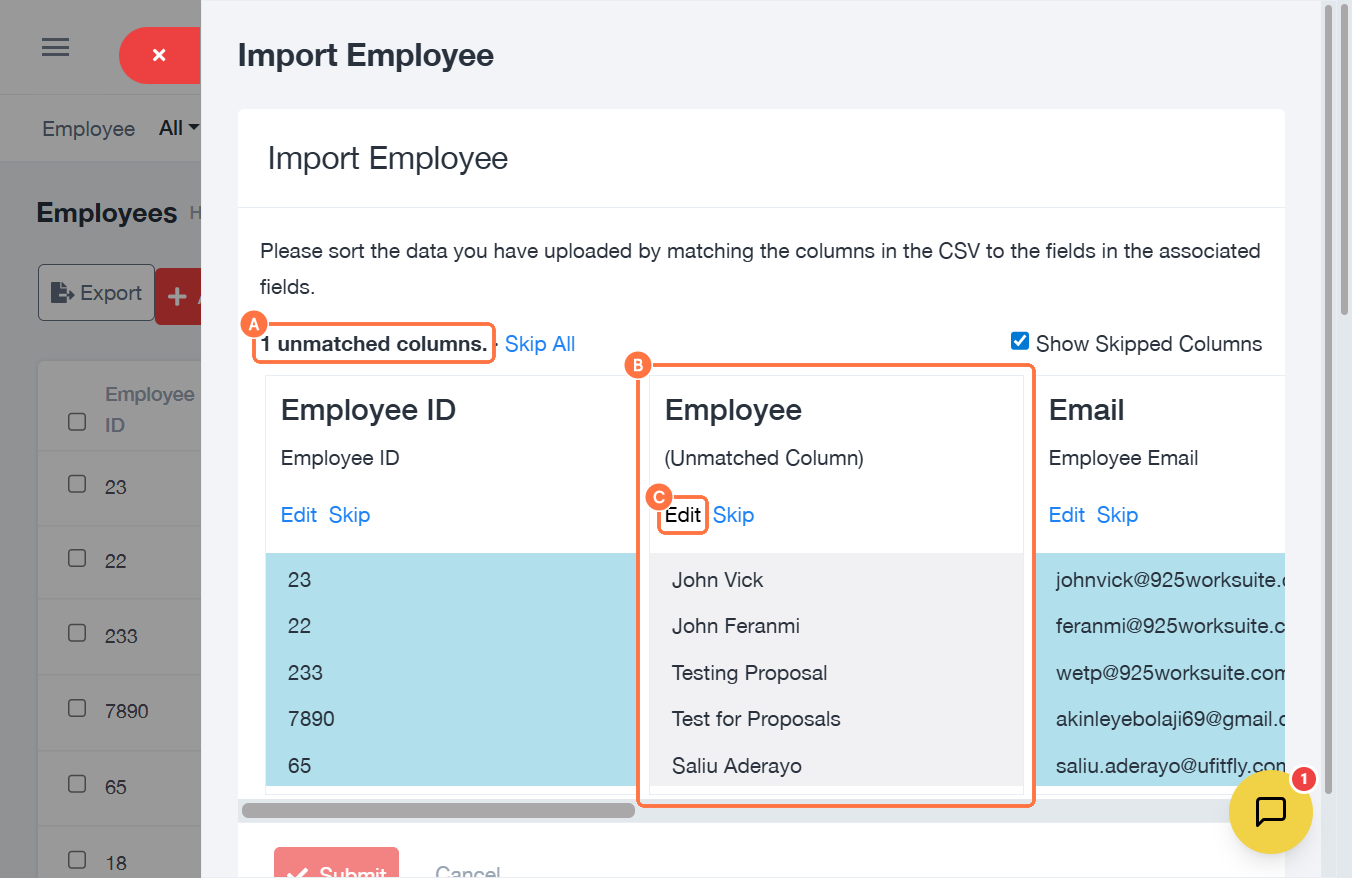
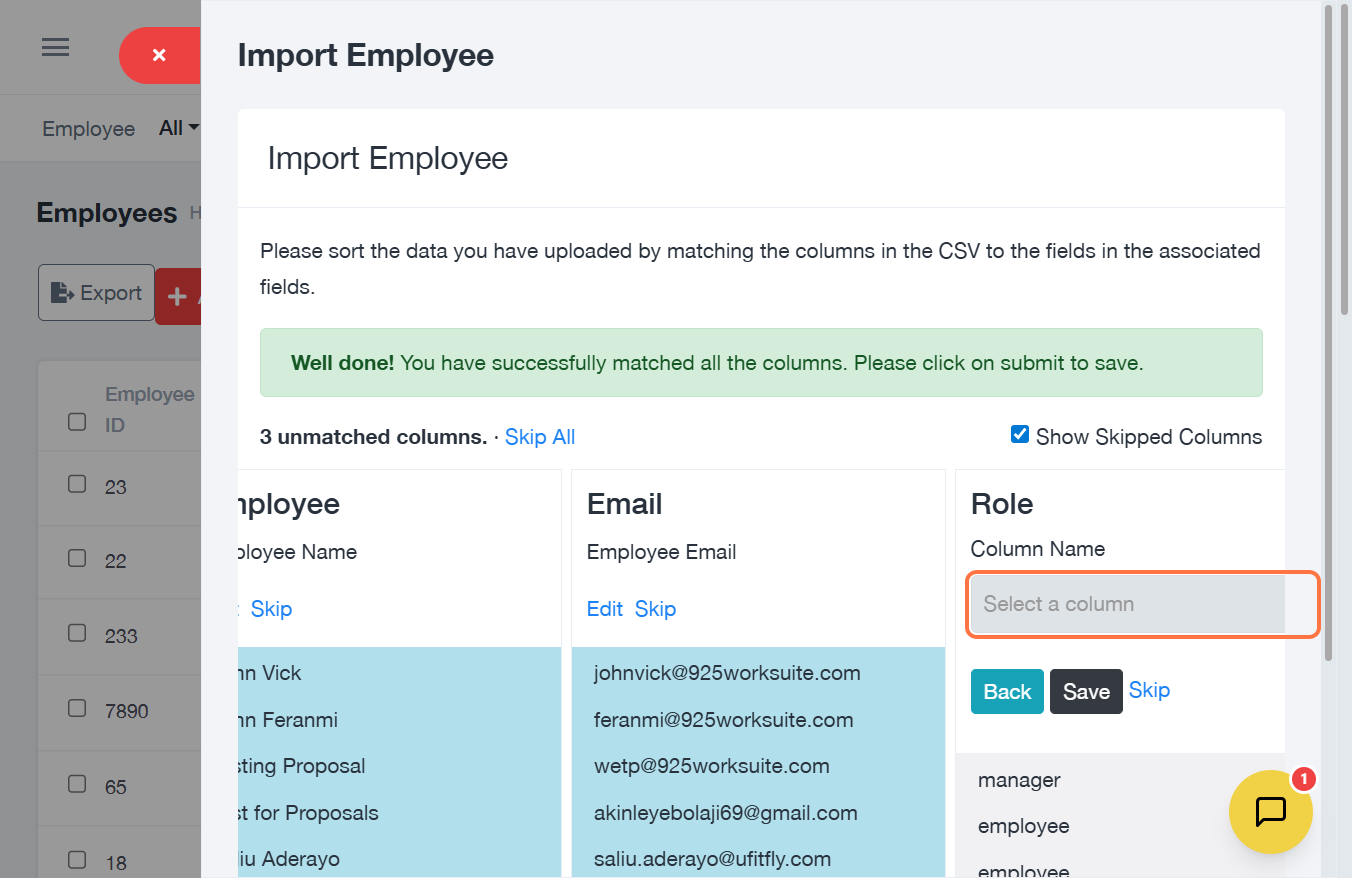
Step 5: Handle Unmatched Columns
-
If a column name in your Excel does not match the system:
- It will appear as an “Unmatched Column”
- You will be prompted to confirm if it matches a system field
Options:
- Click Edit → Match it to the correct system field
- Click Skip → Ignore the column
⚠️ If a column is skipped and remains unmatched, it will be excluded from import.
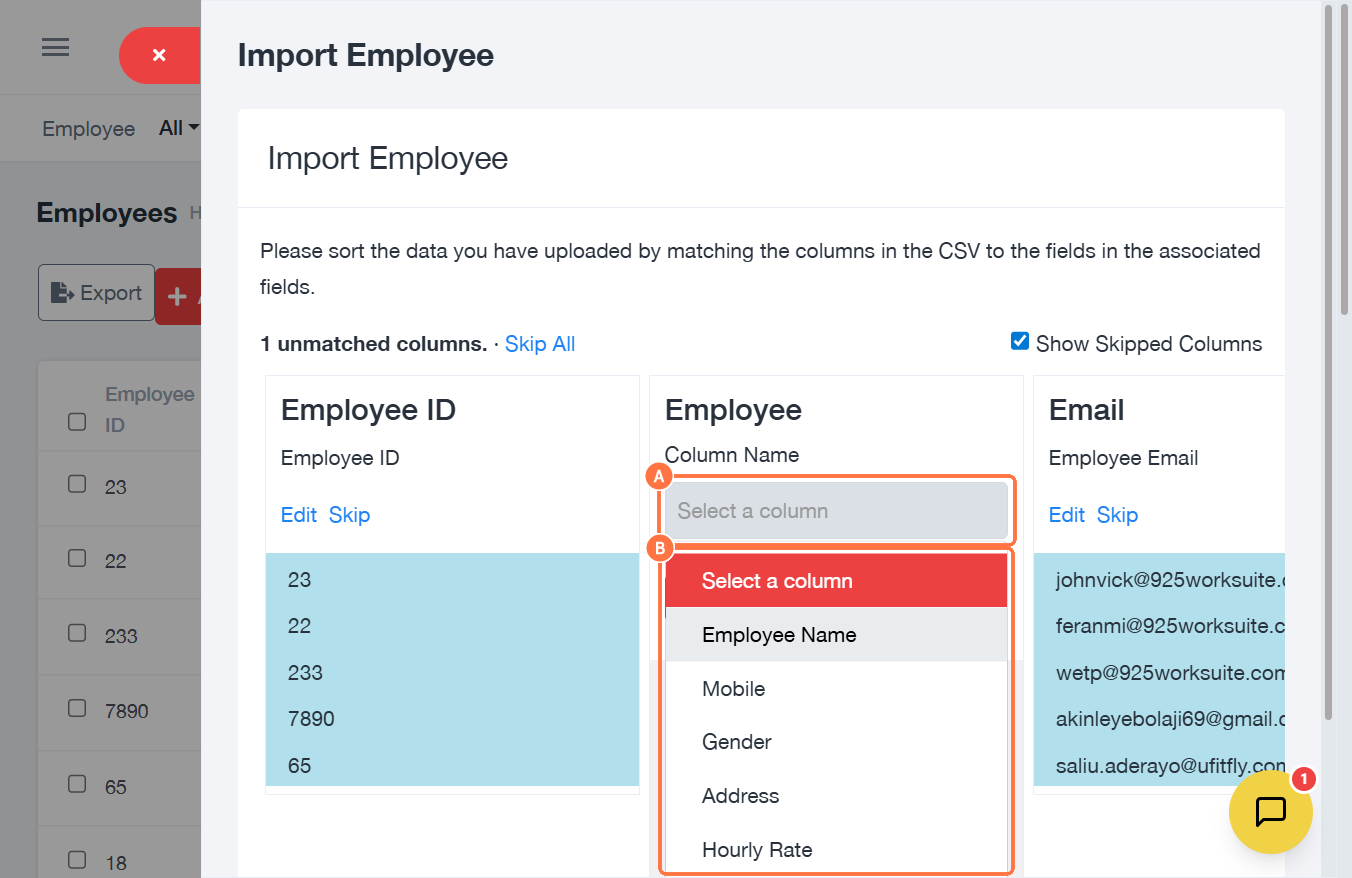
Step 6: Map Columns
- Click on Select a column
- Choose the corresponding system field from the dropdown
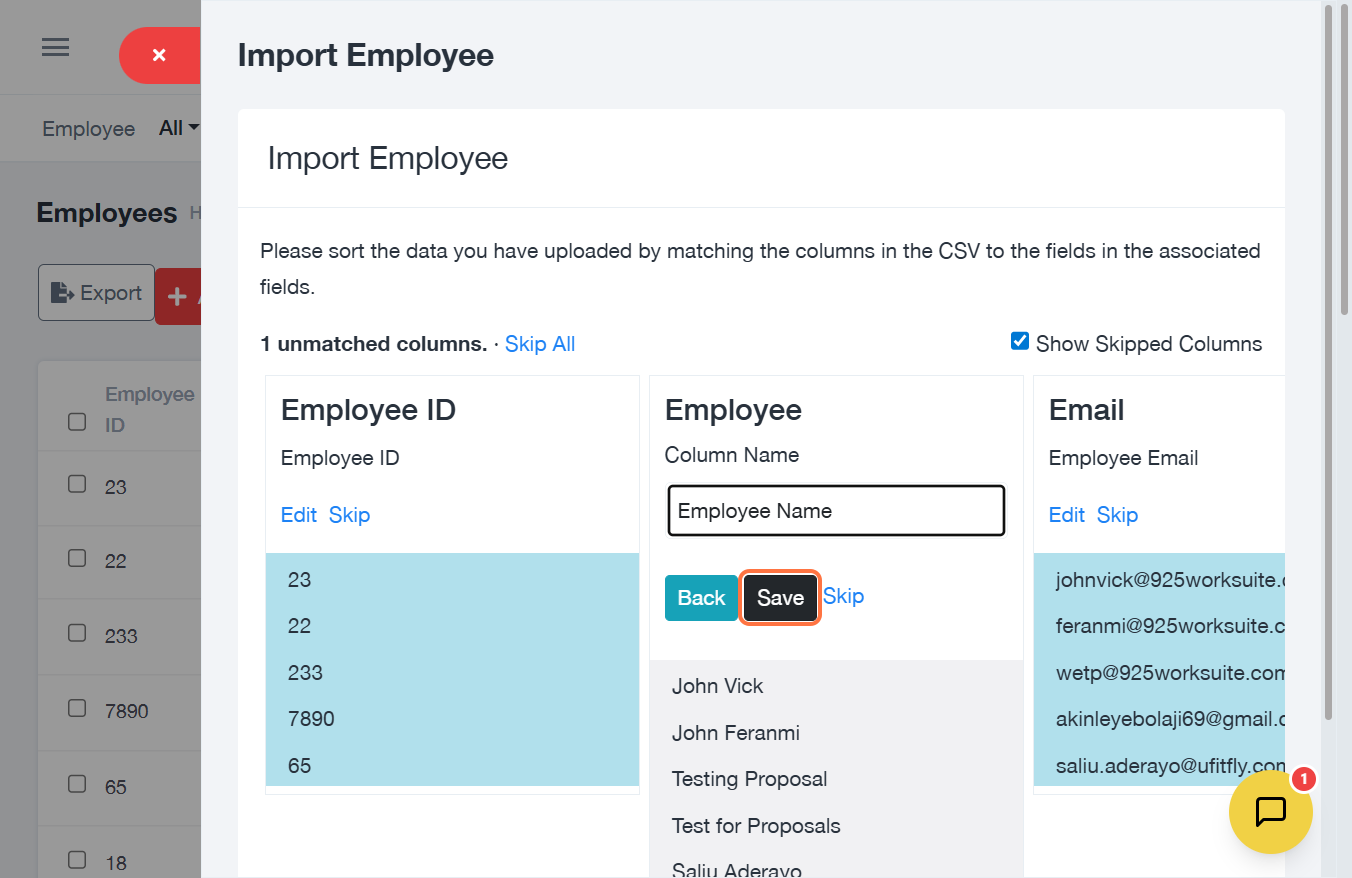
Step 7: Save Mappings
- After matching each column, click Save
- The system maps columns based on your Excel headings
Example:
If your Excel file has 10 headings, 10 columns will appear for mapping.
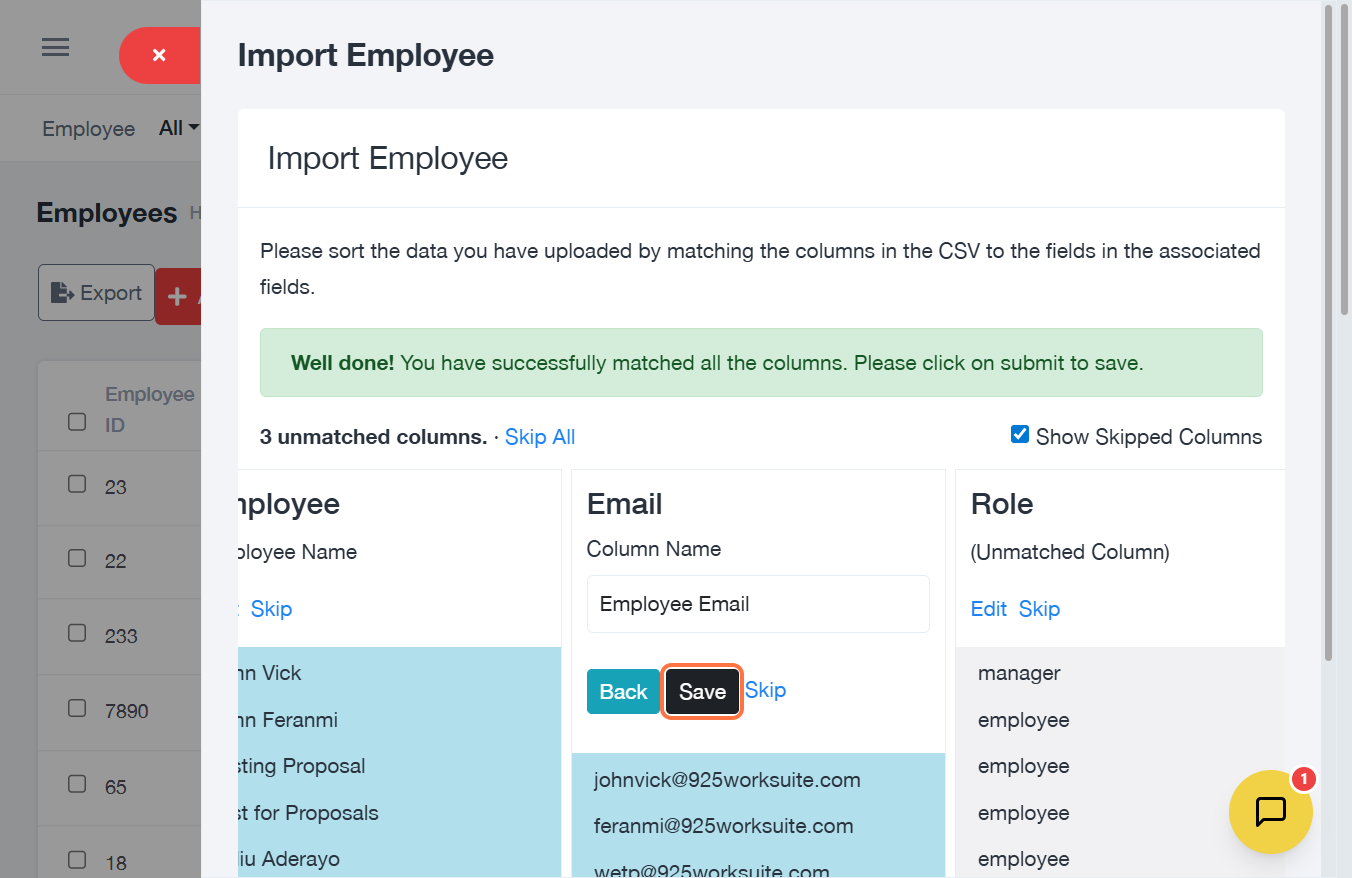
Step 8: Skip Unnecessary Columns
- Click Skip if a column is not needed for import
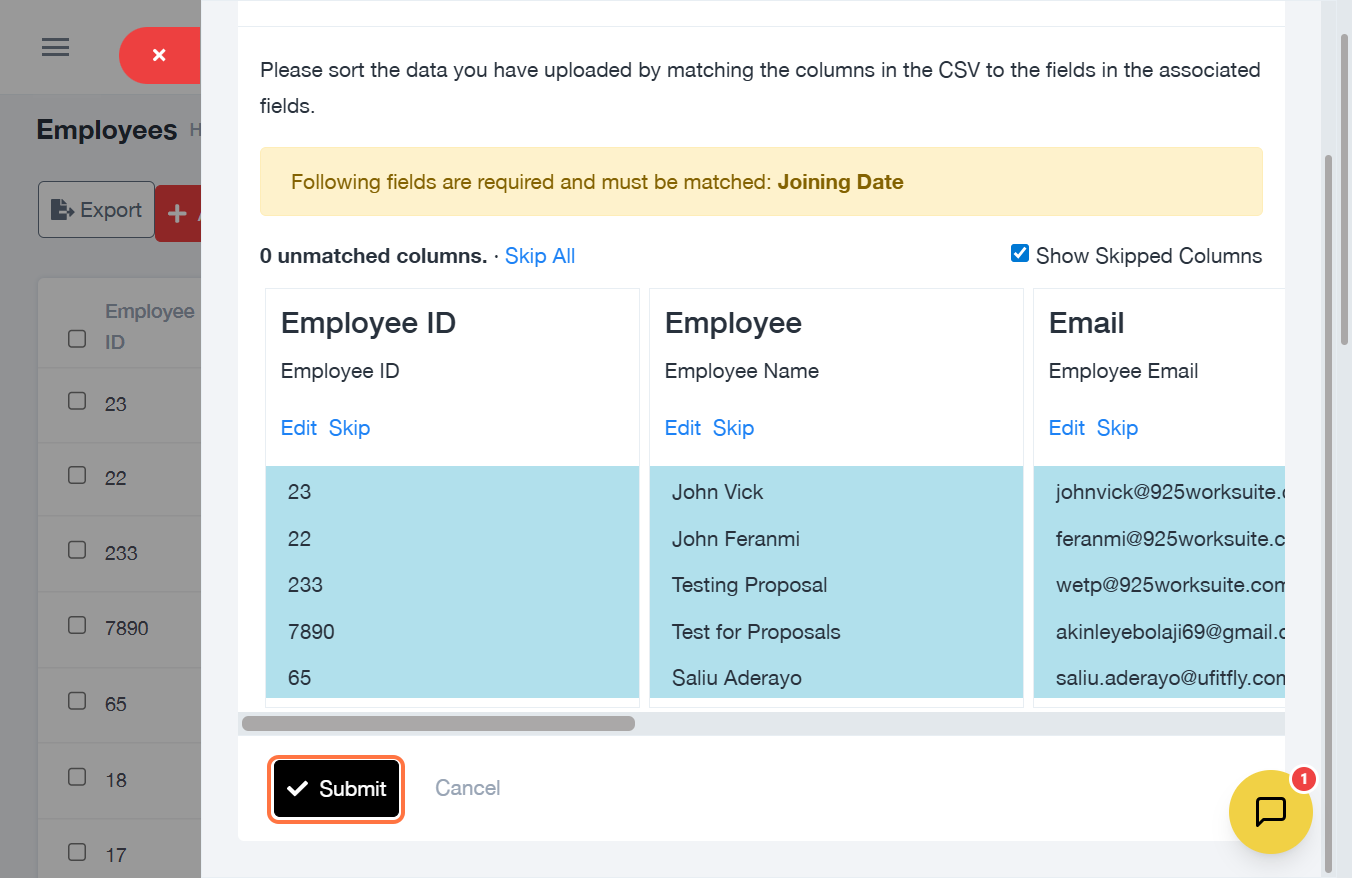
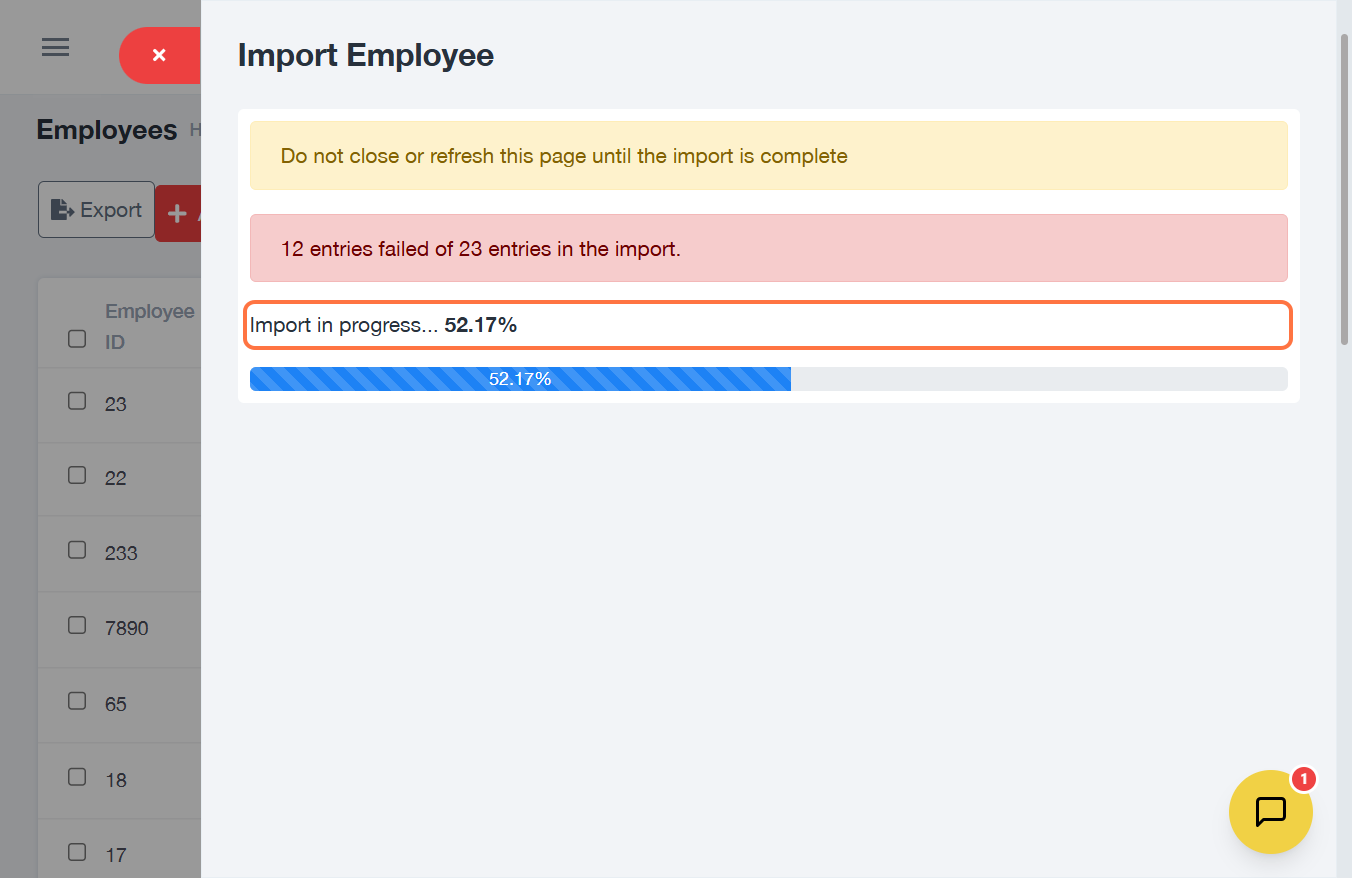
Step 9: Complete Import
- Click Submit
- Monitor progress under Import in Progress
Expected Outcome
- Employees will be successfully uploaded into the system
- Only matched and valid columns will be imported