Knowledge Article
How to Add Leads in CRM (925 worksuite ERP)
0
0
Overview
This guide explains how to add a new lead in the CRM module. Creating leads allows sales teams to track potential customers, manage opportunities, and organize sales activities efficiently.
Steps
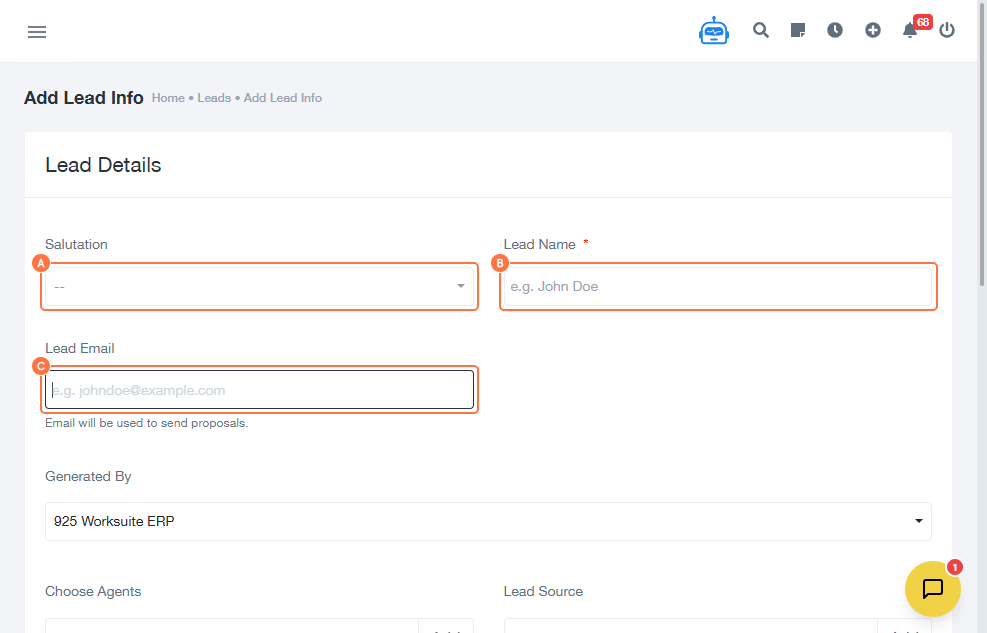
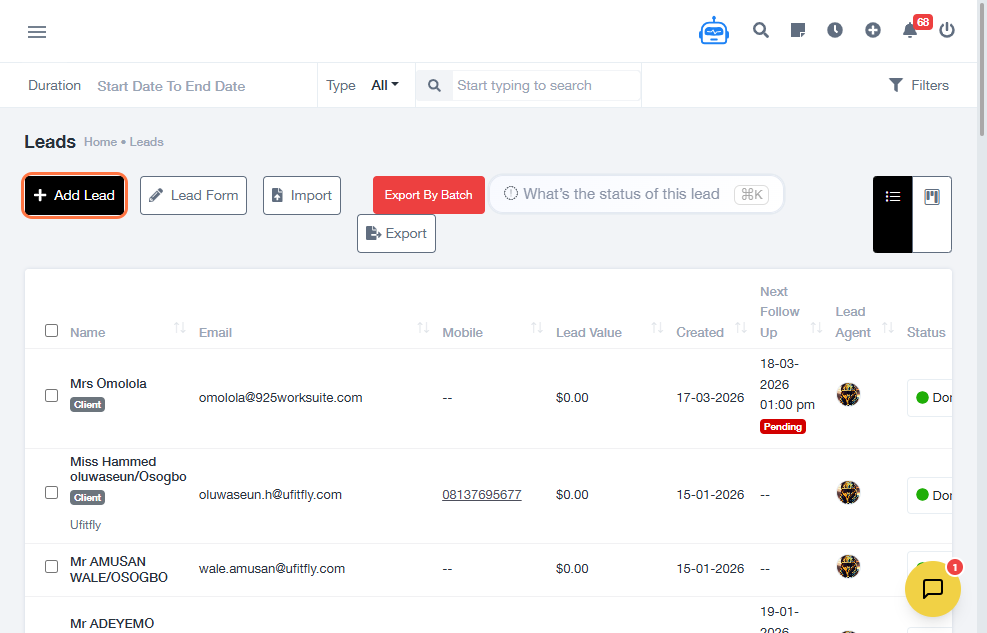
- Navigate to CRM → Leads.
- Click Add Lead.
-
Enter the lead’s basic information:
- Lead Name
- Lead Email
- Fill in the required lead details.
- Click Add to create the lead.
- Close the confirmation window.
- Enter the Lead Value.
- Click Yes to confirm.
- Select the lead status and choose a product.
- Add notes if needed.
- Open Company Details.
-
Enter company information:
- Company Name
- Website
- Mobile Number
- Office Phone Number
-
Provide location details:
- State
- City
- Postal Code
- Address
- Enter additional contact details if required.
- Click Save.
Expected Result
The new lead will be successfully saved and displayed in the CRM Leads list for tracking and follow-up.
Common Errors
- Required fields not completed
- Invalid email format
- Lead not saved before closing the window
- Missing company or contact information
FAQs
Can I edit a lead after creating it?
Yes, leads can be edited from the Leads list.
Is email mandatory when adding a lead?
Yes, valid contact information is required for proper tracking.
Can I assign products while creating a lead?
Yes, products can be selected during lead creation.
Why is my lead not saving?
Ensure all required fields are completed before clicking Save.
Attached files