Knowledge Article
How to Create a Sale in 925POS
0
0
How to Create a Sale in 925POS (Demo Store)
Overview
This guide walks you through how to create a sale in the Demo Store using 925POS. This process allows you to record transactions, assign customers, apply taxes, and save sales records accurately.
Step-by-Step Guide
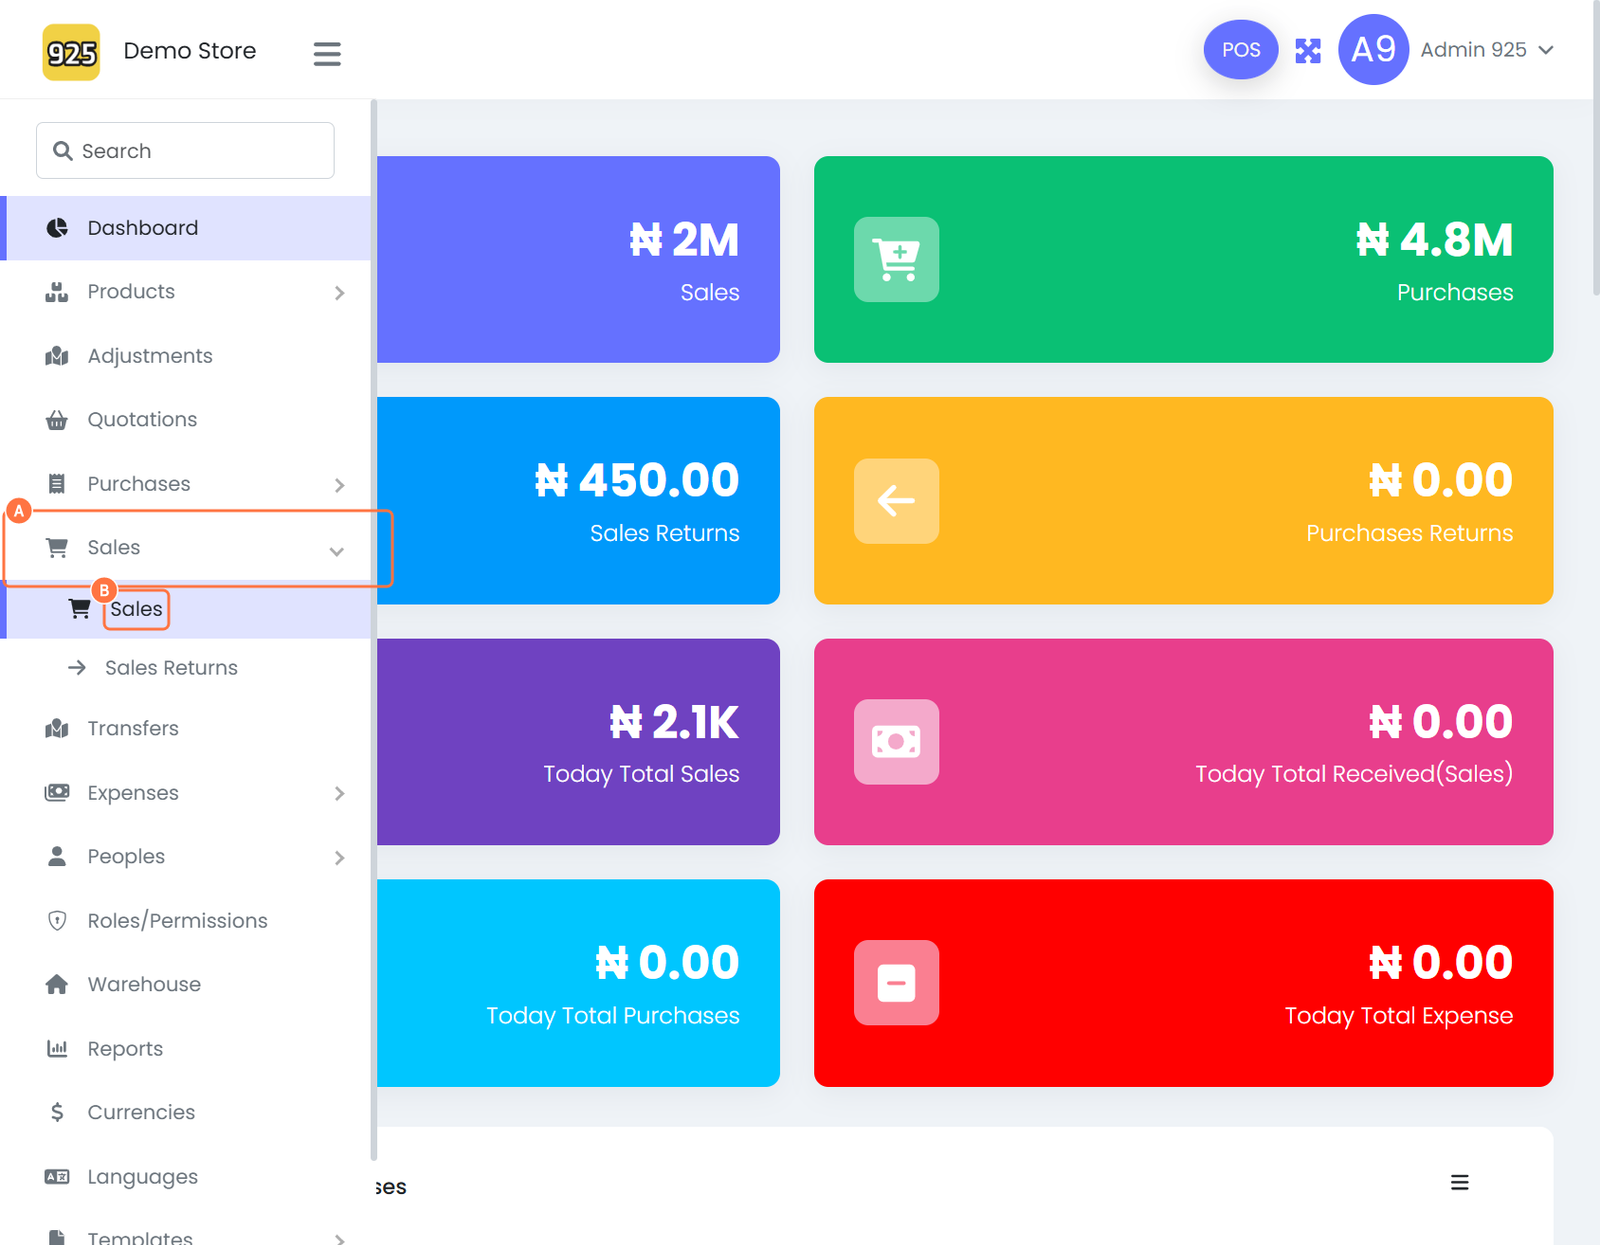
Step 1: Navigate to Sales
- From your dashboard, click on Sales
- Select Sales again from the dropdown menu
Step 2: Create a New Sale
- Click on Create Sale
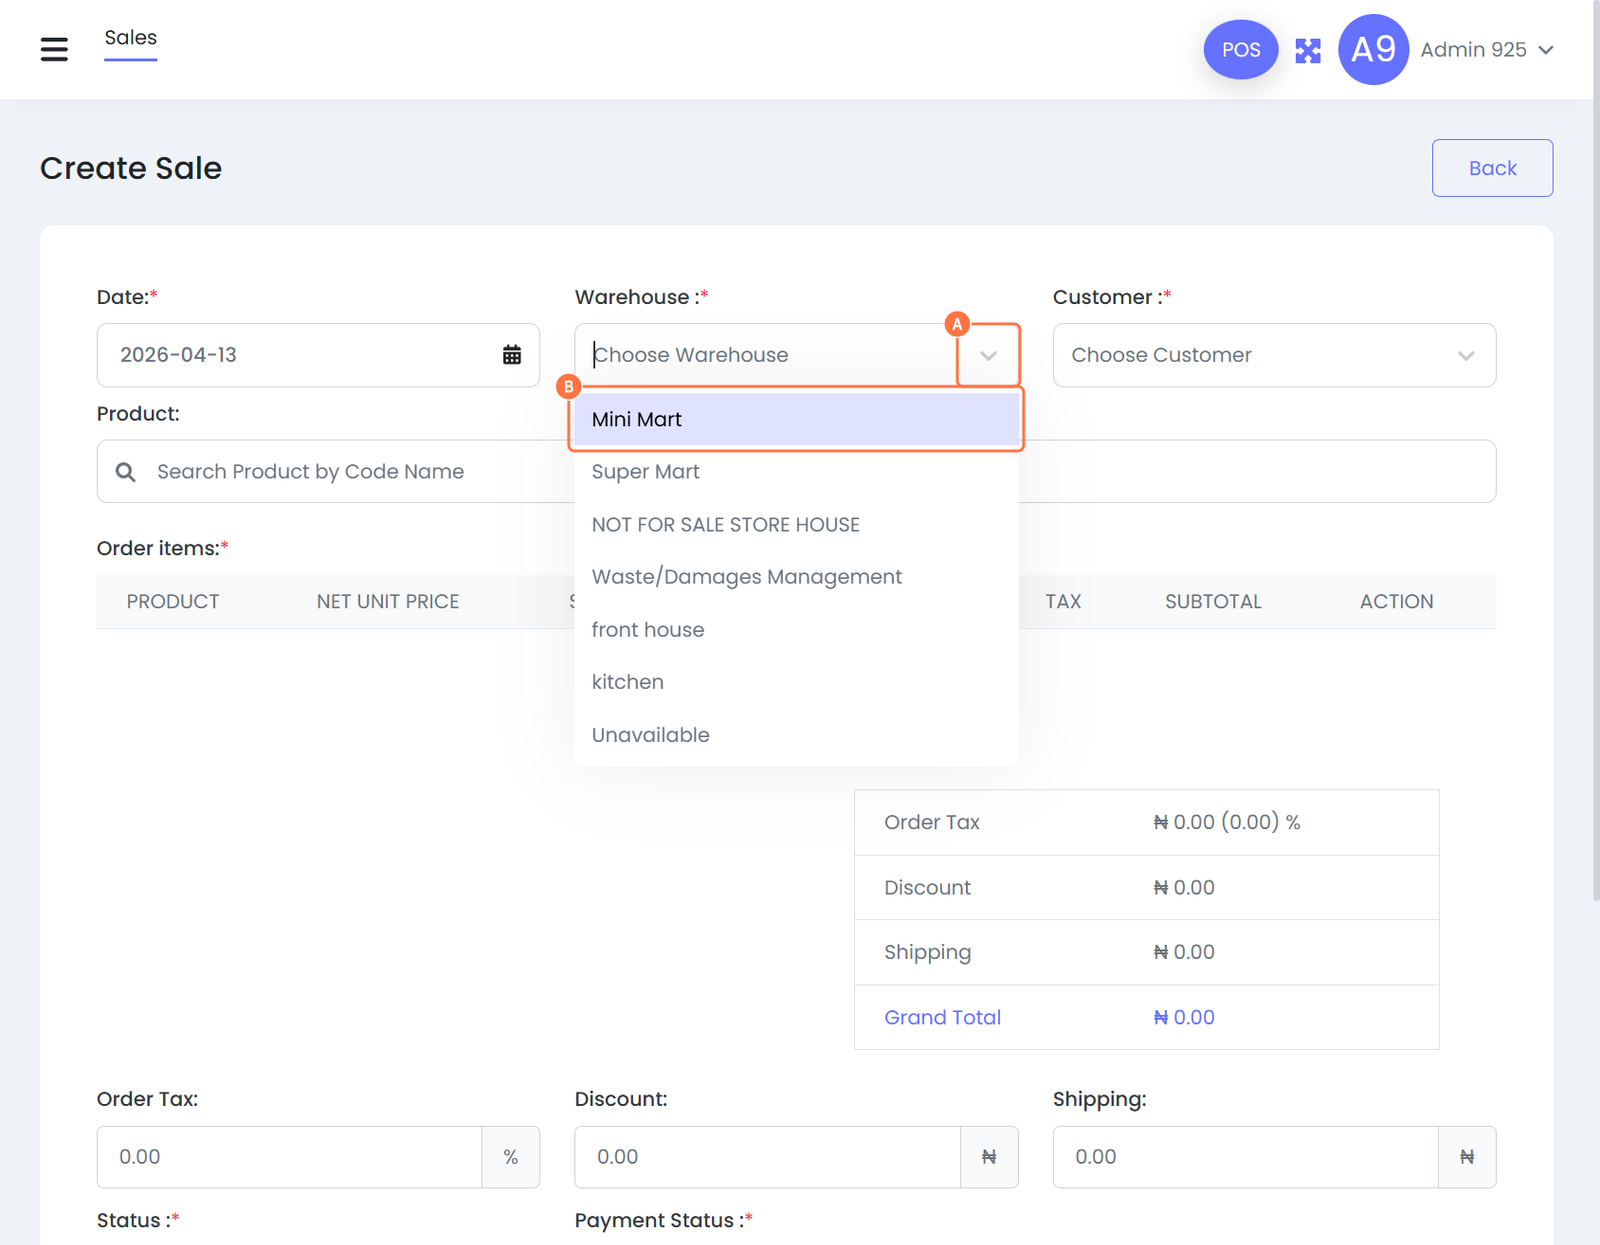
Step 3: Fill in Required Details
Enter all necessary information for the sale:
- Date
- Warehouse (source of goods)
- Customer Name
- Product
- Tax (if applicable)
Ensure all required fields are properly completed before proceeding.
Step 4: Select Customer
- Click on Choose Customer
- Select the appropriate customer from the list
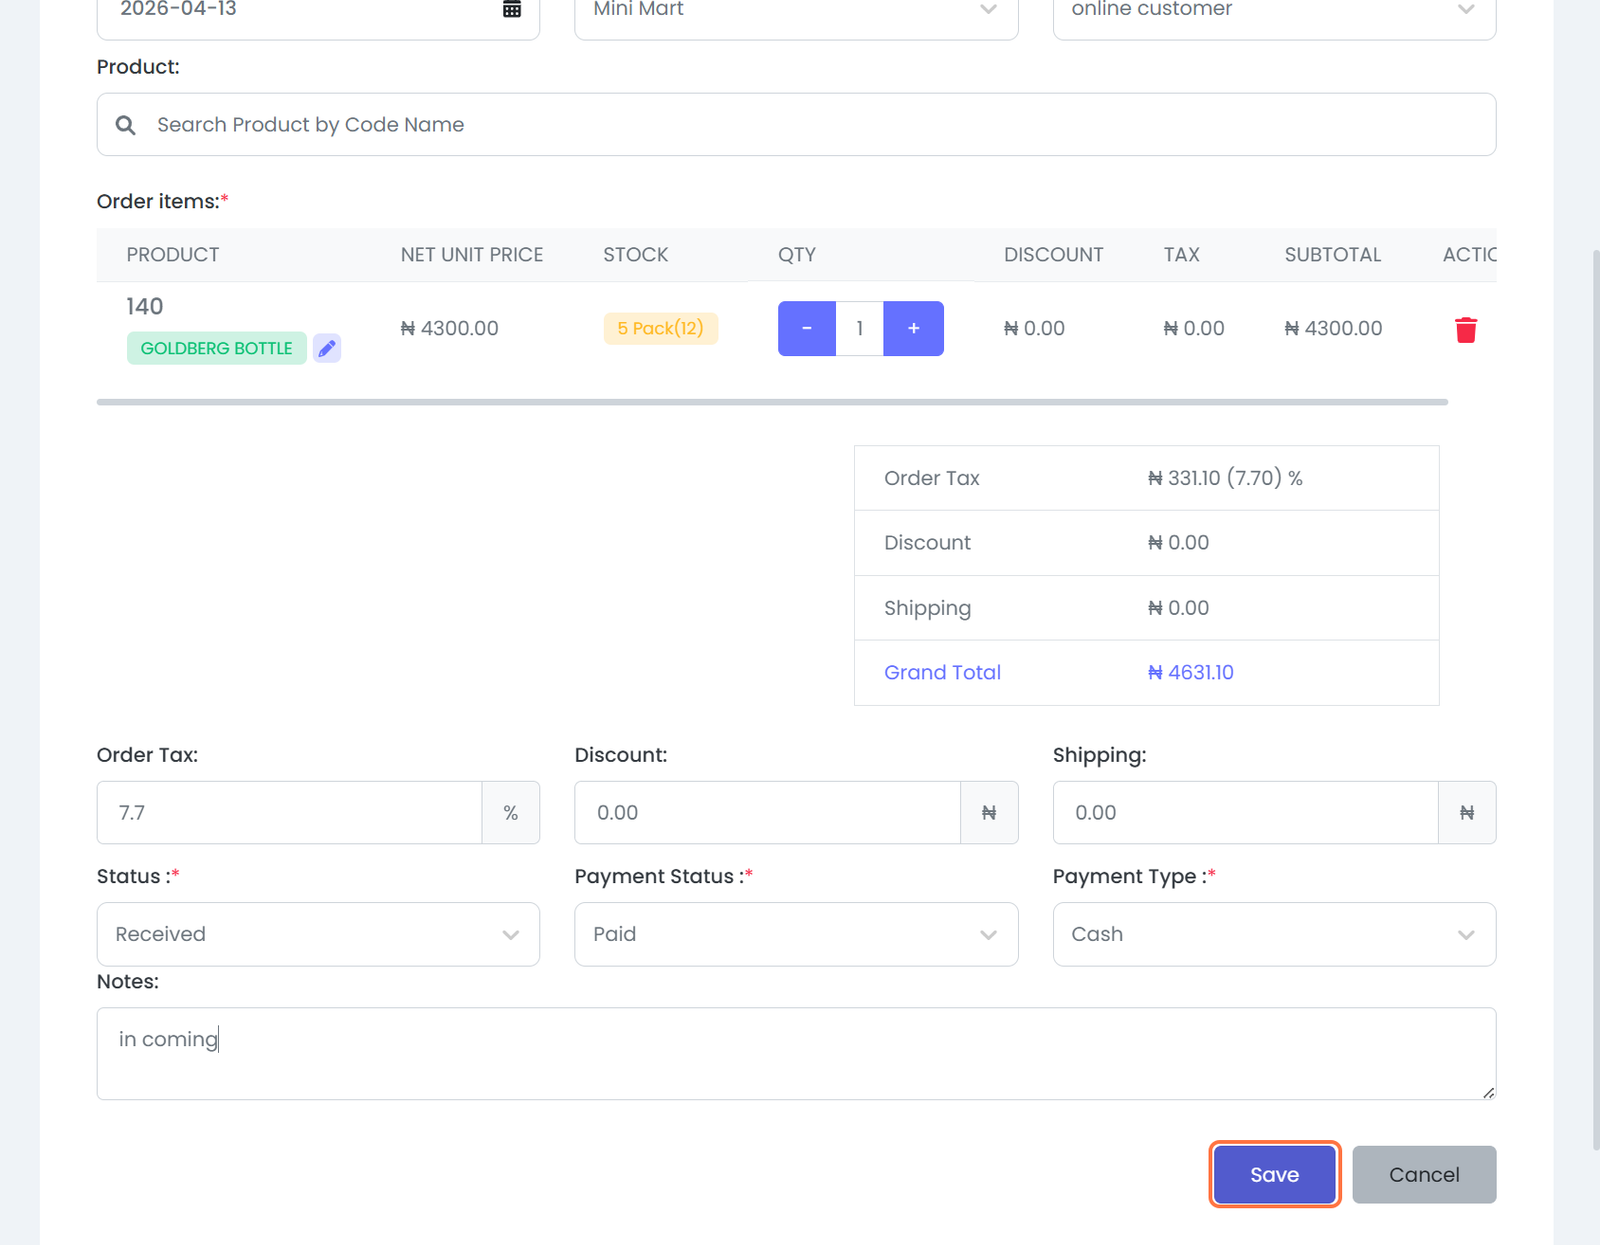
Step 5: Add Product
- Type the name of the product
- Select the product from the dropdown options
Step 6: Apply Tax
- Enter the Order Tax value if applicable
- This may reflect product-level or order-level tax
Step 7: Add Notes (Optional)
- Include any relevant notes for the transaction if necessary
Step 8: Save the Sale
- Click on Save to complete the transaction
Best Practices
- Always confirm the correct warehouse to avoid inventory errors
- Double-check customer details before saving
- Ensure tax values align with your configured tax settings
- Use notes for special instructions or references
Expected Outcome
Once saved:
- The sale is recorded successfully
- Inventory is updated automatically
- The transaction becomes available for reporting and tracking
Attached files